How to Use 1 AWG Copper Wire for Electrical Projects?
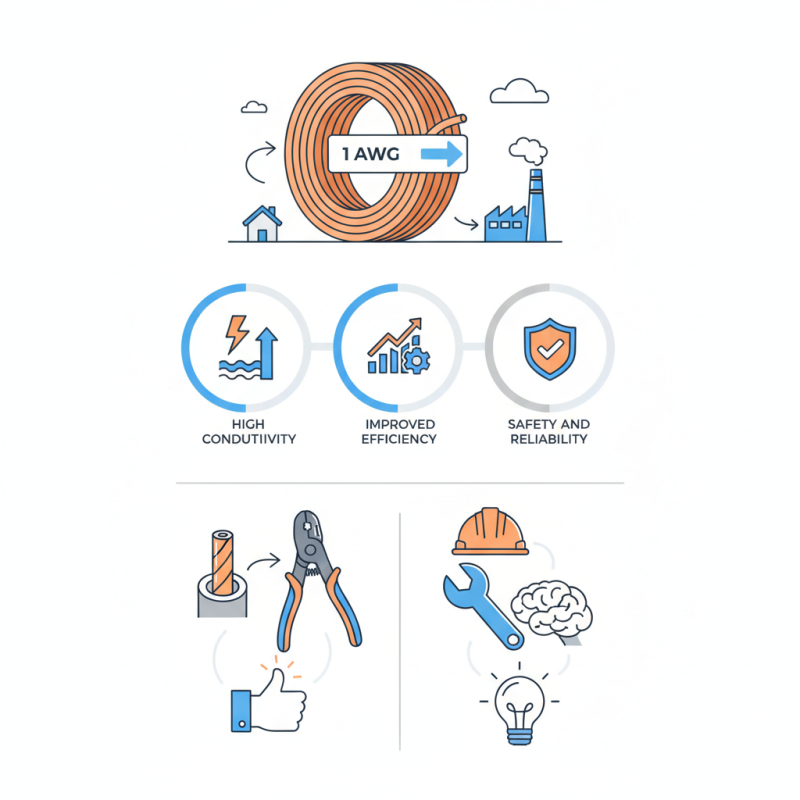
Electrical projects often require careful consideration of materials. One crucial aspect is the choice of wire. The 1 AWG copper wire stands out for its durability and versatility. According to data from the Institute of Electrical and Electronics Engineers, copper wire is known for its excellent conductivity. This makes it ideal for various electrical applications, from residential setups to industrial uses.
Expert John Smith, a notable figure in electrical engineering, emphasizes the importance of using the right gauge. He stated, "Using 1 AWG copper wire can significantly improve the efficiency of your electrical system." His perspective highlights the wire's capability to handle high currents without excessive voltage drop, which can enhance overall performance.
Despite its advantages, 1 AWG copper wire can be a challenge for some. Handling this thicker gauge requires specific tools and techniques. Missteps can lead to improper connections or safety hazards. Thus, gaining experience in its use is essential. Understanding these aspects will ensure successful and safe completion of your electrical projects.
Understanding the Characteristics of 1 AWG Copper Wire
1 AWG copper wire is widely used in various electrical projects due to its specific characteristics. With a diameter of 0.287 inches, it has a cross-sectional area of 83.69 mm². This size allows for substantial conductivity, making it suitable for applications that demand high current capacity. According to the National Electrical Code (NEC), 1 AWG wire can handle up to 130 amps in typical situations.
When evaluating the characteristics of 1 AWG copper wire, it’s essential to consider its heat resistance and flexibility. The wire can maintain its integrity in high-heat scenarios, with a maximum temperature rating of 90°C in dry locations. However, users should also be aware that bending the wire excessively can lead to micro fractures. Such issues can compromise performance over time.
Tips for working with 1 AWG wire:
Always double-check the ampacity requirements for your specific project. Overloading the wire can lead to overheating. Additionally, use proper connectors to ensure secure and stable connections. This can prevent potential electrical failures. Always practice safety precautions while handling the wire, as improper techniques can lead to dangerous outcomes.
Common Applications of 1 AWG Copper Wire in Electrical Projects
1 AWG copper wire is commonly used in various electrical projects due to its excellent conductivity and durability. Its cross-sectional area is approximately 8.37 mm². This size is ideal for heavy-duty applications, allowing it to handle significant current loads. According to industry data, 1 AWG wire can safely carry around 130 amperes for standard residential installations, making it a popular choice among electricians and engineers.
In residential wiring, 1 AWG copper wire is often employed for service entrances and subpanels. It is also utilized in various outdoor applications such as landscape lighting and electric fencing. A common mistake is underestimating the wire's ampacity in high-demand scenarios. This could lead to overheating risks, posing a safety hazard. Additionally, many DIY enthusiasts find themselves unsure about proper installation techniques. Properly securing connections and avoiding sharp bends can mitigate potential long-term issues.
Another application includes solar energy systems. The wire's robust nature allows for safe current flow from panels to inverters. However, using it incorrectly for oversize applications can lead to financial waste and inefficiency. Having adequate knowledge about load calculations is crucial. It ensures that projects remain within safety parameters while maximizing efficiency. Understanding these applications and their limitations is necessary for successful project outcomes.
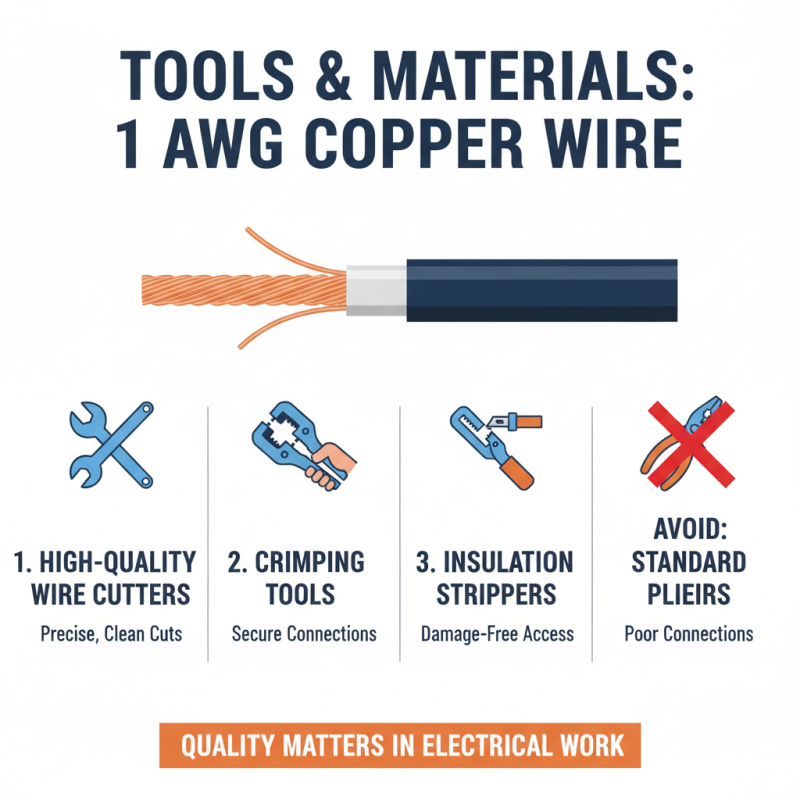
Tools and Materials Needed for Working with 1 AWG Copper Wire
When working with 1 AWG copper wire, having the right tools and materials is essential. You'll need a pair of high-quality wire cutters. A good set of crimping tools is also necessary for making secure connections. Insulation stripping tools will help you access the copper without damaging it. While some may try to use standard pliers, this can lead to poor connections. Remember, quality matters in electrical work.
You'll also require connectors that are suitable for this gauge of wire. They must match the application, whether it’s for a vehicle or home project. Electrical tape or heat shrink tubing is necessary for insulation. This adds a layer of protection against short circuits. But too much insulation can make future repairs difficult. Always balance between protection and accessibility.
Safety gear is crucial, too. Wear safety glasses to protect your eyes during cuts. Gloves can help avoid injuries but may impede your grip. Reflect on your workspace, ensuring it’s organized to prevent accidents. Each project has its challenges. Expect some trial and error while working with heavy gauges.
Safety Precautions When Using 1 AWG Copper Wire
When working with 1 AWG copper wire, safety is paramount. This wire is thick and can carry a significant load, but it also poses risks if not handled properly. Always wear insulated gloves when touching it. They protect against electric shock. Ensure your workspace is dry. Water and electricity do not mix.
Inspect the wire for damage before use. Look for any signs of fraying or cuts. Damaged wire can cause short circuits or fires. Use proper tools designed for heavy-gauge wire. Standard tools might not grip or cut effectively, leading to injury.
Keep your work area organized. Avoid clutter, which can lead to accidents. Have a fire extinguisher nearby, just in case. Even with precautions, things can go wrong. It’s essential to reflect on past experiences to improve safety practices. Share your experiences with others. Learning from mistakes can promote a safer environment for everyone involved.
Electrical Projects Using 1 AWG Copper Wire
Step-by-Step Instructions for Installing 1 AWG Copper Wire
Installing 1 AWG copper wire requires careful preparation and attention to detail. Begin by gathering the necessary tools: wire strippers, a wrench, and electrical tape. Safety is paramount. Wear gloves and goggles to protect yourself. Cut the wire to your desired length, ensuring you have enough slack for connections.
Next, strip about an inch of insulation from both ends of the wire. This step is crucial for ensuring a solid connection. Connect one end to the electrical panel. Tighten the screw securely to avoid any future issues. The other end will connect to your device or outlet. Be mindful when handling live wires; double-check your circuit breaker is off.
After connecting, insulate all bare wire with electrical tape. This prevents accidental shocks. Inspect your work. Are all connections secure? Testing the circuit is essential before finalizing everything. It would be best to check voltage levels with a multimeter. If something seems off, don't hesitate to revisit your connections. Small mistakes can lead to significant hazards.
How to Use 1 AWG Copper Wire for Electrical Projects? - Step-by-Step Instructions for Installing 1 AWG Copper Wire
| Step |
Action |
Purpose |
Tools Needed |
Safety Precautions |
| 1 |
Plan Your Project |
Ensure the project is feasible using 1 AWG copper wire. |
Measuring tape, project diagrams |
Wear safety glasses while working on plans. |
| 2 |
Gather Materials |
Collect all necessary wire, connectors, and tools. |
1 AWG copper wire, wire cutters, connectors |
Check that materials are rated for your project. |
| 3 |
Cut Wire to Length |
Prepare wire lengths appropriate for connections. |
Wire cutters, measuring tape |
Use gloves to avoid cuts. |
| 4 |
Strip Wire Ends |
Prepare wire for connection by removing insulation. |
Wire strippers |
Wear safety glasses; be careful with tools. |
| 5 |
Make Connections |
Connect wires according to the project specifications. |
Connectors, electrical tape |
Ensure power is off before making connections. |
| 6 |
Test Connections |
Verify connections are secure and functioning. |
Multimeter |
Check tools before testing; avoid wet areas. |
| 7 |
Secure Wiring |
Ensure wires are organized and secured. |
Cable ties, clips |
Make sure all wiring is out of high-traffic areas. |